Just In Time for Cinco de Mayo – Guacamole

I can’t believe it’s been over a year since my last blog post, and what a year it’s been.  A global pandemic, a retirement, a cross-country move, going back to the Department of State Office of Inspector General as a retired annuitant leading inspections of Department programs and hopefully, next year, embassies overseas.  

A lot has changed in the past year. You’ll see that Jeannine’s Cuisine has a new look that reflects some of those changes. We now live in Helena, Montana!  We had previously purchased some land here and planned to build a home.  However, when our builder wanted to charge us more than $800,000 for a pretty basic 2,600-square foot home, we decided to go a different route instead.  We found a one-story rancher with the spectacular mountain views you see in the photo at the top of this post.  We’re still working on making it home, but we’re getting there. I’m down to three boxes. Yeah!

Before I went back to work I enrolled in a food photography course taught my Kimberly Espinel, a former Saveur magazine food photographer of the year and a wonderful instructor. It was a little difficult juggling work and photography homework, but it was so worth it. You can check out Kimberly’s blog here. The photos in this blog post were my final project for the class. I think you’ll agree I learned a lot in the class.

On to the recipe – I’ve always wanted to do a post for Cinco de Mayo. When I was looking for ideas for my final project for my photography class, I decided on guacamole. It’s delicious and healthy, and it’s not just for tortilla chips anymore, although some chips and guacamole with a frosty margarita sounds like a perfect combo to me.  Serve it with tacos or anything else you are preparing for Cinco de Mayo.  Pile it on toast, an omelet, or over fresh greens for a salad.  I just love avocados and anything made with them. After doing the photographs for this post, however, and going through two of the big bags of avocados from Costco, I’m going to take a little break from eating them for a while.  

Guacamole

Yield 1 1/2 Cups

You can make this guacamole as simple or elaborate as you choose.  Some purists just mix avocado with salt and pepper and call it a day.  Don’t like tomatoes?  Skip them.  If you only have lemons instead of lime, use lemon juice instead.  I love the taste of cilantro, but some people really detest it.  You do you!  

2 avocados

1 garlic clove, peeled and finely chopped

Salt to taste

2 tablespoons of finely chopped cilantro

Juice from 1/2 lime

Chopped hot chile to taste (I like to use one serrano, but you can also use jalapeno, habanero or skip it altogether)

1/4 white onion, finely chopped

1/2 tomato, chopped into 1/4-inch pieces

Remove the seed from the avocados and place the flesh in a bowl.  Smash the avocado with a fork or a potato masher.  Add salt to taste and any remaining ingredients you choose.  Mix to combine and serve immediately.  

You can extend the life of the guacamole by squeezing lime juice over the top and pressing plastic wrap on the surface to keep out the air.  Just stir the lime juice in before serving.  

Adapted from Mexican Everyday by Rick Bayless

Cheese Straws and Prosciutto Palmiers

Puff Pastry 1Today’s recipe is inspired by the Biltmore Estate in Asheville, NC. This is my fourth and final post on Food Blog Forum 2014. The food, the networking, and the forum sessions were all wonderful; however, for me, the stand-out was the city of Asheville itself and the wonderful hospitality that was shown to our group by the Biltmore and Explore Asheville Foodtopia personnel.

Biltmore 1

So what does puff pastry have to do with the Biltmore Estate? After our sessions we were treated to a tour of the Biltmore Estate with a focus on food. The house is everything you could imagine, i.e., drop-dead gorgeous. Those Vanderbilts knew what they were doing.  But, more important, we were allowed to photograph anything in the estate; a huge opportunity, as photography is not normally allowed. As I was looking over my collection of photos from the tour, I realized many of them focused on places where you could enjoy a snack, with perhaps a cup of tea or a glass of sherry…

Biltmore 2

Perhaps while while enjoying the view of the Blue Ridge Mountains from the loggia.


Biltmore 3

I love libraries, and this one is no exception. I could see nibbling on some cheese straws, while cozied up on the sofa with a book.


Biltmore 4

Guests were often offered a cup of tea and a snack while waiting in the winter garden.


Biltmore 5

Or for a more formal high tea, I can imagine sitting here with a tray of palmiers.


Party season is approaching, and both of these appetizers are great with cocktails. They go nicely along side a hot bowl of soup as well.


Do not fear puff pastry. If you can use a rolling pin you can make this pastry. The one thing you must remember is to keep your dough cold. Chill the counter if possible (see recipe note below), and keep the space as cool as you can. This is not a recipe for a hot summer day, without a good air conditioner. If the dough gets too warm, you’ll know because it will become a little greasy and sticky. No worries, just pop it into the refrigerator for about 10 minutes to cool it back down. This recipe does take some time, but the taste of puff pastry made by hand with real butter is so satisfying.


Puff Pastry (Pate Feuillete)

Yield: 2 Pounds


This recipe makes 2 pounds of puff pastry. Store-bought puff generally comes in 14-ounce to 1-pound boxes. If you prefer to use store bought puff pastry, skip ahead to the cheese straw and palmier recipes. Use 1 box pastry for each appetizer or half of this recipe. The pastry can be frozen. Thaw thoroughly in the refrigerator before using.  Before starting chill a section of counter space with a sheet pan with some ice in it on top of a towel. This step is not completely necessary but it will help keep the dough chilled while you work with it.

1 pound butter, cut into large chunks

1 pound flour, plus extra for work surface

1 tablespoon salt

1 cup cold water

1/2 teaspoon lemon juice


Puff Pastry 2

Place the flour, butter and salt in the mixer bowl.  Mix together a little by hand, then pulse the mixer with the paddle to coat the butter chunks with flour.


Puff Pastry 3

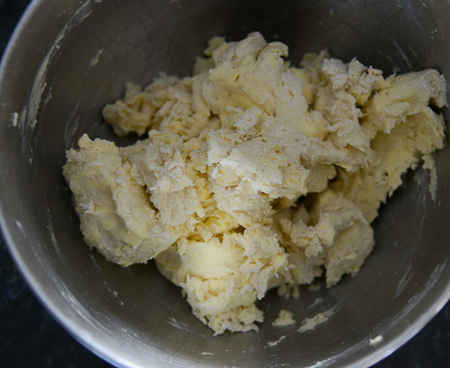
Add the water and the lemon juice all at once then pulse the machine until a sticky dough forms.  Flour the work surface with enough flour to keep the dough from sticking. Place the contents of the mixer bowl onto the chilled work surface.

Puff Pastry 4

Use your knuckles to push the dough into a large rectangle. Make sure the rectangle can be moved with a pastry scraper.


Puff Pastry 5


Roll out the dough into a large rectangle, then fold into thirds. This is called a turn.  Turn the dough 90 degrees so the short edges of the rectangle are to your right and left and roll the dough and fold again. Continue rolling and folding until you have completed four complete turns. If you work fast you can probably complete all the turns at once. But, if you are doing something else (like photographing the process for this post), you will need to refrigerate the dough between turns. You must keep the dough cold while doing the turns to create the layers in the pastry.


Puff Pastry 6

Chill the dough until ready to use. When you are ready to continue, roll out the dough into a large rectangle about 1/4-inch thick.


Puff Pastry 8

Cheese Straws

Approximately 50


The wonderful thing about this recipe is its versatility. The sky is the limit on how much or what type of seasoning you use. You can prepare the cheese dough ahead of time. After coating with toppings roll up like a jelly dough and freeze. Thaw in the refrigerator 12 hours or overnight before cutting and baking. If making both recipes I prepare the cheese straws first, then raise the oven temperature to 400 for the palmiers.


1/2 recipe or 1 box puff pastry, chilled

1 egg, beaten

4 ounces parmesan cheese, finely grated

4 tablespoons sesame seeds, optional

1 teaspoon paprika or cayenne, or to taste


Preheat the oven to 350. If you have not already done so, roll out your puff pastry dough. Brush the surface with egg, then sprinkle with half the cheese, sesame seeds and paprika. Turn the dough over and repeat.


Cut the dough into 1/4 or 1/2-inch strips and twist before placing on a sheet pan or cookie sheet covered with parchment. Push the ends of the strips flat agains the pan to hold them in place. For shorter, fatter cheese sticks, fold the strips in half before twisting. Bake for 15-20 minutes or until golden brown. Cool on a wire rack before serving. Good warm or at room temperature.


Puff Pastry 9

Prosciutto Palmiers

Approximately 36


1/2 recipe or 1 box puff pastry, chilled

6 tablespoons honey mustard

8 ounces prosciutto, thinly sliced

4 ounces parmesan cheese, freshly grated

2 eggs, beaten


Preheat the oven to 400. If you have not already done so, roll out your puff pastry dough. Spread the mustard over the dough. Arrange the prosciutto over the mustard so that it covers the pastry completely. Sprinkle with the parmesan and lightly press it into the prosciutto with a rolling pin.


Starting at one long edge, roll up the pastry like a jelly roll just to the middle of the rectangle. Then repeat on the other side. It should look like this:


Puff Pastry 7


Chill the roll for 30 minutes before slicing the rolls crosswise into 1/2-inch thick slices. Place on parchment-covered sheet pans or cookie sheets and press with your hands to flatten. Brush with egg. Bake 15-20 minutes until puffed and golden. Cool on a wire rack. Can be served warm or at room temperature.


Palmier recipe adapted from The Silver Palate Good Times Cookbook by Sheila Lukins, Julee Rosso, and Sarah Leah Chase


Dates with Sausage and Bacon

Dates 1

A couple of years ago in a quest to find an eating plan to negate the rich cuisine and fabulous beer we were enjoying a little too much in Germany, I stumbled upon something called the Primal Blueprint.  It’s a variation of sorts on the Paleo Diet; however, unlike strict Paleo, it allows some rice and a little high fat dairy.  Both plans stress “real food” and restrict consumption of grains, legumes, and refined sugars.  As with most restrictive eating programs, I wasn’t very successful, but my husband was and continues the program to this day.

I believe the Primal Blueprint is a good program for a lot of people, my husband included, and I try to be very supportive of his new, healthier eating habits.  It probably doesn’t hurt me to cut back on carbohydrates either.  Eliminating most grains and legumes (what no sandwiches?) proved to be a challenge.  Although we have always tried to limit processed food, I was clearly in the “no fat, whole grains” camp, and this was a complete switch.   It was also a great excuse to add to my ever-expanding cookbook collection.

Dates 2

I read every Primal and Paleo cooking blog I could find online and eventually figured out on whom I could probably rely for some decent recipes, while I learned to plan menus around this new eating style.  Everyday Paleo quickly became one of my favorites.  One of the first books I bought was this one, and one of the first Paleo recipes I made was dates stuffed with sausage and wrapped in bacon.  I wish I could take credit for this recipe.  One bite and I was hooked. I have yet to meet anyone who does not like this recipe, Paleo follower or not.

Dates 3

Dates with Sausage and Bacon

12 pieces

We have found that Medjool dates work best for this recipe, but if you can’t find them any other type will do.  If they are considerably smaller, you will need more dates and more bacon than the recipe calls for.  This recipe doubles or even triples easily, a good thing since it’s so addicting.

12 dates

1/2 pound bulk sausage

6 slices bacon, sliced in half crosswise

Preheat the oven to 375. 

Pit the dates if necessary, by slicing them lengthwise halfway through and removing the seeds.

Use about a tablespoon of sausage per date, more or less depending on the size of your dates.  Stuff the sausage into the date, wrapping the date around the sausage ball.  The dates will not close around the sausage completely.

Wrap each date in one of the half slices of bacon and stand up in a baking dish small enough to hold the dates upright. Depending on the number of dates you are preparing a small to medium Pyrex works great for this, but you could also bake them in a pie pan. 

Bake dates for 40 minutes.  These can be prepared ahead of time, frozen, and rewarmed in the microwave for 1.5 minutes.  It’s great to have a stash in the freezer for unexpected guests.

Slightly adapted from Everyday Paleo by Sarah Fragoso 

Herb-Scented Gougères

Gougeres 1

When I was in culinary school, we spent a considerable amount of time honing our pâte à choux skills.  Choux pastry is a combination of eggs, flour, water and butter that results in a light fluffy pastry used for éclairs, cream puffs, and other pastries.  I think we probably made it every way possible, but I never had the chance to make gougères, the savory puffs with cheese in the dough. I often saw the pastry class making them, even had the opportunity to try them, but waited in vain for the day our class would finally make them.  Maybe I missed that day, who knows?  It was many years ago and I had all but forgotten my desire to make gougères, when I came across a recipe for them in an old copy of Bon Appetit magazine.  I was looking for ideas for a party and decided herb-flavored gougères would make the perfect cocktail snack and they did. I had a pile of fresh thyme that I didn’t want to lose and it turned out to be wonderful with the gruyère I used. You could vary the type of cheese you use and use any type of herb – an Italian version with parmesan and oregano, a fall version with sage and fontina…the possibilities for this recipe are endless.

Gougeres 2

Herb-Scented Gougères

Makes about 40

Please do not be put off by the difficulty level of this recipe.  It’s actually quite simple to make and the results are well worth the trouble.  These can easily be made ahead of time and frozen.  Place frozen gougères on baking sheets in a preheated 325-degree oven and warm for 15 minutes.

6 tablespoons butter (3/4 stick or 3 ounces)

3/4 teaspoon salt

1 1/4 cups all-purpose flour

4 large eggs

1 1/2 cups grated gruyère cheese (6 ounces)

2 tablespoons fresh thyme leaves, divided

1/2 teaspoon freshly ground black pepper

1 large egg yolk, for egg wash

Preheat the oven to 400 degrees.  Line two baking sheets with parchment.  Place butter, salt, and 1 cup warm water in a medium saucepan; bring to a boil and stir until the butter is melted.  Remove the pan from the heat and stir in the flour.

Place the pan back on the stove on medium heat and stir vigorously until the mixture pulls away from the sides of the pan and forms a ball, about 2 minutes.  Continue stirring for another 2 minutes.  A dry film will form on the bottom and sides of the pan and the dough will no longer feel sticky.  Mix in the eggs, one at a time until fully incorporated, then stir in the cheese, half of the thyme and the pepper. 

Place the dough in a piping bag with a 1/2-inch round tip or a plastic bag with a 1/2-inch opening cut from a corner. Pipe 1-inch rounds about 2 inches apart on the prepared baking sheets.  Whisk the last egg yolk with 1 teaspoon water and brush it on the dough rounds.  Sprinkle the rounds with the remaining thyme.

Bake the gougères until puffed up and golden; 20-25 minutes.  They will dry out in the center and will sound hollow when you tap them.   

Adapted from Bon Appetit